


Installing vinyl windows means more than setting a new window into an opening. A good install controls water, air, and heat loss around the frame. The WAT-Safe method helps homeowners measure, prep, flash, shim, seal, insulate, and test vinyl windows so they fit well and last longer.
Introduction
Vinyl window installation looks simple until the trim comes off. The old frame may be out of square. The sill may show rot. The siding may hide a weak water path. That is why the job should be treated as a wall repair, not just a window swap.
The WAT-Safe method stands for Water, Air, and Thermal control. Water must drain out. Air must be sealed. Heat loss must be reduced without bending the frame. If one part fails, the window may leak, stick, sweat, or feel drafty even if the glass is new.
Key Takeaway
Use this quick rule before installing vinyl windows:
- Check the frame before ordering or setting the new window.
- Measure width, height, and diagonals.
- Choose insert or full-frame based on damage and access.
- Prepare the sill so water can drain out.
- Shim and screw the window without bending the frame.
- Use caulk, flashing, and foam only where they belong.
- Test the window before trim hides the work.
What Should Homeowners Know Before Installing Vinyl Windows?
Installing vinyl windows starts with one clear idea: the window is part of the wall. It has to fit the opening, shed water, block drafts, and support the energy rating listed on the product label. If the frame is crooked or the sill traps water, the new window cannot fix that by itself.
A vinyl replacement window may fit inside the existing frame. A full-frame vinyl window removes the old frame and exposes the rough opening. The rough opening is the framed hole in the wall where the window sits. It must be clean, dry, square, and strong enough to hold the unit.
The U.S. Department of Energy says heat gain and heat loss through windows can account for about 25–30% of home heating and cooling energy use. That is why the Air and Thermal layers matter. A small draft line around the frame can reduce comfort, even with a new ENERGY STAR window.

Should You Choose a Replacement Insert or Full-Frame Vinyl Window?
Choose a replacement insert if the existing frame is solid, square, and dry. Choose a full-frame vinyl window if there is rot, mold, water staining, damaged trim, or poor old flashing. This choice affects cost, siding work, drainage, insulation, and long-term leak risk.
| Window Type | Best For | Main Benefit | Main Risk |
| Replacement insert | Sound existing frame | Less trim and siding work | Hidden rot can stay covered |
| Full-frame vinyl window | Rot, leaks, or major repair | Better access to flashing and insulation | More labor and finish work |
| Flanged window | New construction or siding removal | Stronger WRB and flashing tie-in | Poor fin sealing can trap water |
| No-flange window | Retrofit, brick, stucco, or existing frame | Less exterior disruption | Sealant and screws must be done well |
A nailing fin, also called a flange, is a flat strip around some vinyl windows. It helps secure the window and connect it with the wall’s water-resistive barrier, or WRB. WRB is the house wrap or water-control layer behind the siding.
The key decision is not just price. It is access. If you cannot reach the sill, WRB, or damaged framing, you may not be able to build the Water layer correctly.
How Do You Measure and Prepare the Window Opening?
Measure before you remove too much. Bad measurements can lead to tight frames, uneven reveals, weak seals, and sashes that will not lock. A small error can create a large problem after foam, screws, and trim are added.
Use this simple measuring process:
- Measure the width at the top, middle, and bottom.
- Measure the height on the left, center, and right.
- Measure both diagonals from corner to corner.
- Use the smallest width and height for ordering guidance.
- Check the window maker’s rough-opening size.
- Inspect the sill, corners, and jambs for rot or soft wood.
- Remove old sash, stops, fasteners, and trim with care.
- Clean old caulk, loose paint, dirt, and broken foam.
Many guides use about 1/2 inch of extra rough-opening space as a common guide, but it is not universal. Always follow the manufacturer’s instructions. If the opening is far out of square, do not force the window. Fix the frame, shim correctly, or rebuild the area before setting the unit.
How Should Trim, Siding, Flashing, and the Rough Opening Be Prepared?
This is the most important Water layer section. The goal is simple: if rain gets behind siding or around the window, it needs a way to leave the wall. A good sill does not act like a bowl. It slopes and drains.
Before setting the window, clean and repair the rough opening. Replace rotten sill wood. Dry the area. Make sure flashing tape can stick. Add sill flashing or pan flashing where the install method allows it. Pan flashing protects the bottom of the opening and should turn up at the sides. A back dam is a small raised edge at the inside of the sill that helps stop water from moving into the room.
Use this prep checklist:
- Clean and dry the opening.
- Repair soft or rotten framing.
- Confirm the opening is level and square.
- Add sill slope where needed.
- Install sill flashing or pan flashing.
- Tie flashing into the WRB.
- Keep weep holes and drainage gaps open.
- Do not seal the bottom nailing fin on a drainable sill.
That last point matters. If the bottom fin is fully sealed, water can get trapped between the window and sill flashing. It may sit there and move into the wall. The sides and top often need sealing. The bottom drainage path needs to stay open when the window system calls for drainage.
How Do You Fit, Shim, Screw, and Seal the New Vinyl Window?
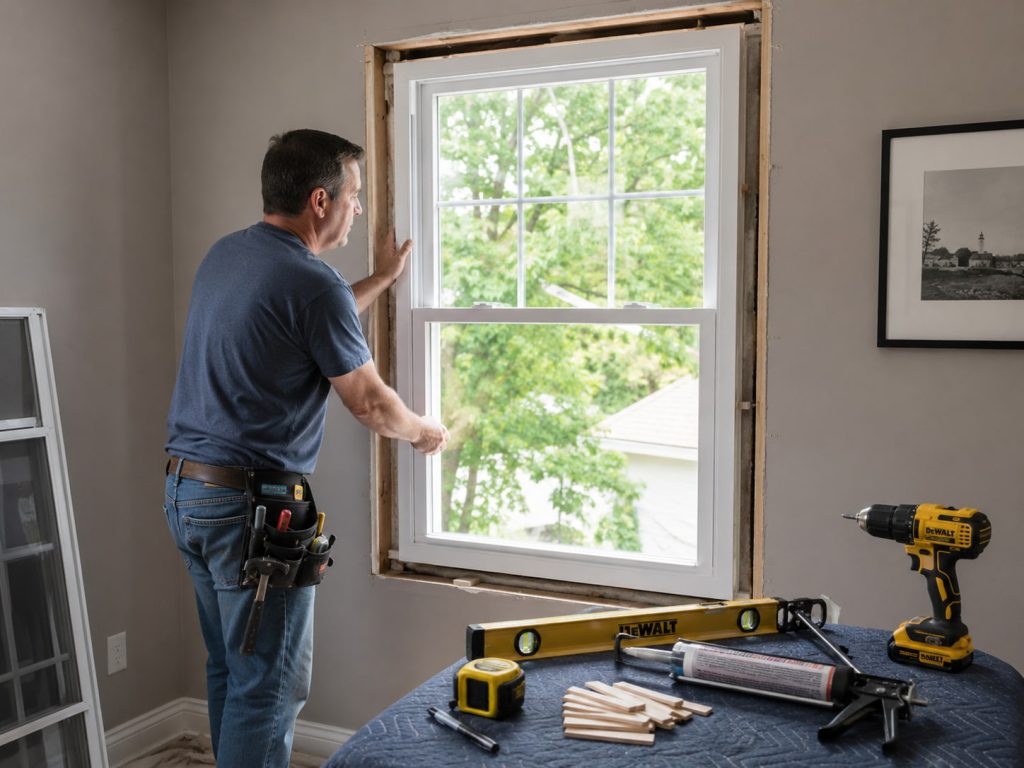
Set the window with a check-shim-screw-recheck process. Dry fit first, center the unit, shim it without pressure, fasten it as the maker shows, then test it before final trim. This prevents bowed frames, sticky sashes, and weak seals.
Follow this order:
- Place the new vinyl window in the opening without final sealant.
- Check the reveal, which is the visible gap around the sash.
- Open, close, and lock the sash.
- Remove the window if the dry fit looks wrong.
- Apply sealant only where the install guide calls for it.
- Set the window back in place.
- Add shims near screw points and support areas.
- Fasten with approved screws or nails.
- Recheck level, square, diagonals, and operation.
Shims should be snug, not forced. Too much pressure can bend the vinyl window frame. Screws should also be controlled. Do not drive them so hard that the frame pulls inward.
Use caulk with care. Seal the sides and top where needed. Do not block weep holes, drainage tracks, or the bottom fin on a drainable install. Good sealing blocks wind and rain without trapping water.
How Do Insulation and Expanding Foam Improve Energy Efficiency?
Insulation improves energy efficiency by closing the gap between the vinyl window frame and the wall. Low-expansion foam made for windows and doors is safer than heavy expanding foam because it fills gaps without pushing hard against the frame.
Backer rod can also help. It is a foam rope placed behind sealant to control the depth of the joint. This helps the sealant move as the window, trim, siding, brick, or stucco shifts with heat and cold.
Do not over-fill the gap. Too much foam can bow the frame, press on the sash, and make the lock hard to align. ENERGY STAR and NFRC ratings depend on proper installation. U-factor measures heat loss. SHGC measures solar heat gain. A poor air seal can weaken real comfort even if the window itself has a good rating.
A smart foam job should do three things:
- Fill the gap without bending the frame.
- Reduce drafts around the opening.
- Keep the sash working before trim is installed.
What Final Checks Prevent Leaks, Drafts, and Poor Window Operation?
Final checks tell you whether the window works before the work is hidden. Open and close the sash several times. Lock it. Look for an even reveal. Check that screws did not pull the frame out of shape. A smooth window now is a good sign that the shims and fasteners are doing their job.
Check air and water control next. Feel around the frame for drafts. Look outside for missed caulk at the sides and top. Confirm weep holes and sill drainage gaps are open. If you use a hose test, do not blast water upward. Test like rain would hit the window, from above and outward-facing areas.
Common mistakes can be easier to fix before trim goes back on.
| Mistake | Problem It Causes | Better Fix |
| Sealing the bottom fin | Trapped water and sill rot | Keep drainage open |
| Over-foaming | Bowed frame and sticky sash | Use low-expansion foam |
| Poor measurements | Gaps or tight fit | Measure width, height, and diagonals |
| Blocking weep holes | Water sits inside the frame | Keep holes clear |
| Ignoring rot | Leaks return later | Repair or rebuild the frame |
| Over-tight screws | Uneven reveal | Loosen, shim, and recheck |
DIY is fine for a simple ground-floor insert in a sound frame. Call a professional installer for structural rot, damaged WRB, stucco or brick repairs, multi-story work, large mulled units, or warranty concerns.

Conclusion
Installing vinyl windows well comes down to fit, drainage, air sealing, and careful insulation. The window should sit square, the sill should drain, the frame should not bow, and the gap around the unit should be sealed without blocking water paths.
Use the WAT-Safe rule before you finish the trim. Ask where water goes, where air can leak, and where heat can escape. If one answer is unclear, fix it before moving forward. A window that looks clean is good. A window that stays dry, tight, and smooth is better.
You May Also Want to Read
You may also want to read:
Finding a Reputable Roofer: Vetting Contractors in Nassau & Suffolk County
Best Roofing Materials for Long Island Homes: Shingles, Metal, and More
FAQs About Installing Vinyl Windows
Should you nail or screw vinyl windows?
Screws are often better because they give more control and can be adjusted. Use the fasteners listed by the window maker. Nails may be allowed on some flanged windows, but poor nail pressure can crack fins or pull the frame out of shape.
Where do you screw in vinyl windows?
Screws usually go through the side jambs or through the nailing fin into solid framing, depending on the window type. Do not screw through weep holes, drainage tracks, or random vinyl parts. Fasten where the window maker shows, then test the sash.
Are vinyl windows installed from the inside or outside?
Replacement inserts are often installed from inside the home. Full-frame or flanged vinyl windows often need exterior access because flashing, WRB, siding, trim, and drainage details must be handled from outside. The right side depends on window type and wall condition.
How long does it take to install a vinyl window?
A simple replacement insert may take a few hours when the frame is sound. Full-frame work can take longer because trim, flashing, siding, insulation, and repairs may be involved. Rot, brick, stucco, or out-of-square framing can add more time.
What tools and materials are needed to install vinyl windows?
Common tools include a tape measure, level, drill, pry bar, shims, utility knife, caulking gun, gloves, and eye protection. Common materials include flashing tape, pan flashing, exterior sealant, backer rod, low-expansion foam, screws, trim, and the correct vinyl replacement window.
